
1. Selelekela
This manual provides detailed instructions for the installation, configuration, and operation of the Intelbras iNVD 5232 32-Channel IP Digital Video Recorder. Please read this manual thoroughly before using the device to ensure proper functionality and to prevent damage.
The Intelbras iNVD 5232 is designed for professional surveillance applications, offering advanced features for recording, monitoring, and managing IP camera feeds.
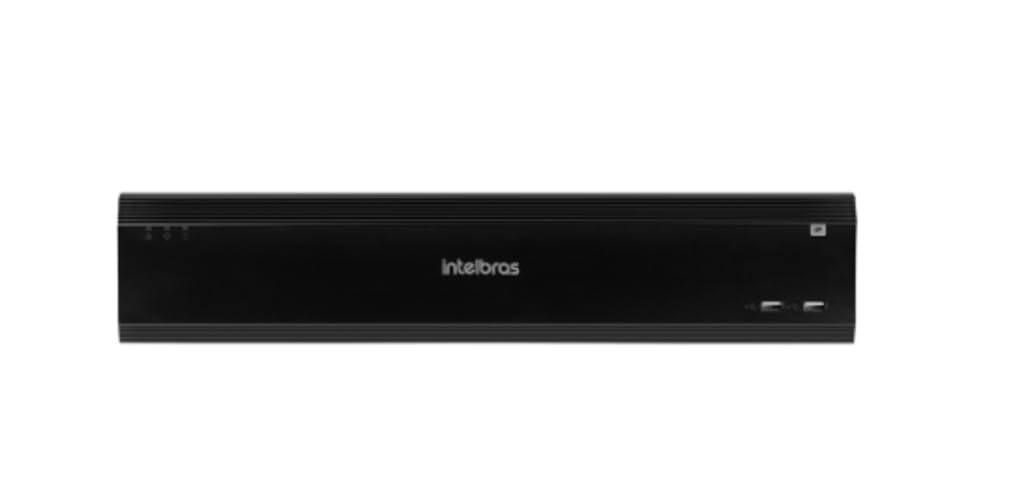
Figure 1: Intelbras iNVD 5232 Digital Video Recorder. This image shows the front panel of the iNVD 5232 unit, featuring a sleek black design with the Intelbras logo and USB ports.
2. Boitsebiso ba Tšireletseho
Latela mehato e latelang ea tšireletso ho thibela kotsi le tšenyo ea sesebelisoa:
- Etsa bonnete ba hore motlakase o na le voltage tsamaisana le litlhoko tsa sesebelisoa.
- Se ke oa beha sesebelisoa sebakeng se mongobo, pula, kapa mocheso o feteletseng.
- Qoba ho beha sesebelisoa letsatsing le tobileng kapa haufi le mehloli ea mocheso.
- Se ke oa bula sesebelisoa casing. Fetisetsa litšebeletso tsohle ho basebetsi ba tšoanelehang.
- Sebelisa feela lisebelisoa tse boletsoeng ke moetsi.
- Properly ground the device to prevent electrical shock.
3. Likahare tsa Sephutheloana
Netefatsa hore lintho tsohle li teng ka har'a sephutheloana:
- Intelbras iNVD 5232 Digital Video Recorder Unit
- Adapter ea Matla
- Mouse ea USB
- Screws for HDD Installation
- Tataiso ea ho Qala ka Potlako
- CD-ROM (containing software and full manual)
4. Sehlahisoa Overview
4.1 Panel e ka pele
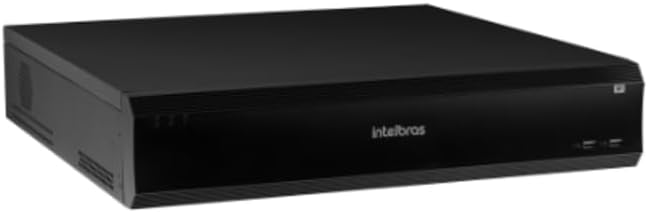
Figure 2: Front Panel of the iNVD 5232. This image displays the front of the DVR, showing LED indicators for power and status, along with two USB ports for peripheral connections.
- Matla a LED: E bontša boemo ba matla.
- Boemo ba LED: E bonts'a boemo ba ts'ebetso ea sistimi.
- Li-ports tsa USB: For connecting a mouse, USB drive, or other peripherals.
4.2 Phanele e ka morao

Figure 3: Rear Panel of the iNVD 5232. This image details the rear connections, including power input, network ports, video outputs (HDMI, VGA), audio inputs/outputs, and alarm terminals.
- Kenyeletso ea Matla: Hokela adaptara ea motlakase e fanoeng.
- HDMI Output: Connect to an HDMI-compatible monitor.
- Sephetho sa VGA: Connect to a VGA-compatible monitor.
- Mekhahlelo ea LAN: Connect to your network for IP camera communication and remote access.
- Audio In/out: Bakeng sa ho hokahanya lisebelisoa tsa audio tsa kantle.
- Alarm In/Out: For connecting external alarm sensors and actuators.
- Li-ports tsa USB: Additional USB ports for peripherals.
5. Seta
5.1 Ho kenya Hardware
- Install Hard Drive (if not pre-installed): Open the DVR casing, mount the hard drive using the provided screws, and connect the SATA power and data cables.
- Connect Monitor: Connect a monitor to the HDMI or VGA output port.
- Connect Mouse: Plug the USB mouse into one of the USB ports.
- Connect Network: Connect an Ethernet cable from the LAN port to your network router or switch.
- Kopanya Matla: Plug the power adapter into the DVR's power input and then into a power outlet. The device will power on automatically.
5.2 Tlhophiso ea Pele
Upon first boot, the system will guide you through an initial setup wizard:
- Khetho ea Puo: Khetha puo eo u e ratang.
- Tlhophiso ea Lekunutu: Create a strong administrator password.
- Litlhophiso tsa Marang-rang: Configure IP address, subnet mask, gateway, and DNS. DHCP is usually enabled by default.
- Letsatsi le Nako: Beha letsatsi, nako le sebaka sa nako se nepahetseng.
- HDD Initialization: Format the installed hard drive for recording.
- IP Camera Search and Add: The system will scan for available IP cameras on the network. Select and add your cameras.
6. Ho sebetsa
6.1 Phela View
After initial setup, the system will display the live view of connected cameras. You can switch between single-camera view, marang-rang a likhamera tse ngata, le tatelano viewho sebedisa ditaolo tse skrineng kapa mouse.
6.2 Taolo ea ho Rekota
- Kemiso ea ho rekota: Configure continuous, motion-detection, or alarm-triggered recording schedules for each camera.
- Ho Rekota ka Manual: Initiate recording manually from the live view segokahanyi.
- Ho bapala: Fumana tse rekotiloeng footage by date, time, and event type. Use the playback controls to navigate through recordings.
- Tlatsa: Export recorded video clips to a USB drive or network storage.
6.3 Phihlello ea Remoutu
The iNVD 5232 supports remote access via a web browser or dedicated mobile application. Ensure your network is configured for remote access (e.g., port forwarding or P2P cloud service activation).
- Web Sebatli: Enter the DVR's IP address into a web sebatli komporong e hoketsoeng marangrang a tšoanang.
- Mobile App: Download the official Intelbras surveillance app from your device's app store. Scan the QR code on the DVR (if available) or manually enter the device ID for connection.
7. Tlhokomelo
7.1 Ho hloekisa
Regularly clean the exterior of the DVR with a soft, dry cloth. Do not use liquid cleaners or aerosols. Ensure ventilation openings are free from dust and obstructions.
7.2 Lintlafatso tsa Firmware
Periodically check the Intelbras website for firmware updates. Firmware updates can provide new features, performance improvements, and security enhancements. Follow the instructions provided with the firmware update package carefully.
7.3 Hard Drive Taolo
Monitor the health of your hard drives through the system's HDD management menu. Replace failing drives promptly to avoid data loss. Configure automatic overwriting of old footage ho etsa bonnete ba ho rekota kamehla.
8. Ho rarolla mathata
| Bothata | Lebaka le ka khonehang | Tharollo |
|---|---|---|
| Ha ho matla | Power cable disconnected; faulty power adapter; power outlet issue. | Check power connections; test power adapter; try a different outlet. |
| Ha ho tlhahiso ea video | Monitor off/disconnected; incorrect video output settings; faulty cable. | Ensure monitor is on and connected; check video cable; try a different output port or cable. |
| Cannot connect IP cameras | Network issue; incorrect camera IP address/credentials; camera not powered. | Verify network connectivity; ensure cameras are powered and configured correctly; check camera credentials. |
| Ha ho rekoto | HDD not initialized/full; recording schedule not set; camera disconnected. | Initialize HDD; check recording schedule; verify camera connection and status. |
9. Litlhaloso
| Sebopeho | Tlhaloso |
|---|---|
| Mohlala | iNVD 5232 |
| Kenyeletso ea Video | 32 Likanale tsa IP |
| Sephetho sa Video | 1 HDMI, 1 VGA |
| Kenyeletso ya Molaetsa/Output | Specific ports (e.g., RCA) |
| Qeto ea ho Rekota | Up to 8MP (depending on camera) |
| Bokhoni ba ho Bapala | Multi-channel synchronous playback |
| Polokelo | Multiple SATA HDD bays (HDDs not included) |
| Khokahano ea Marangrang | Likoung tsa Gigabit Ethernet |
| Sesebelisoa sa USB | Boema-kepe ba USB 2.0/3.0 |
| Phepelo ea motlakase | DC 12V (adapter included) |
| Mocheso oa ho sebetsa | 0°C ho isa ho 50°C (32°F ho isa ho 122°F) |
10. Tiisetso le Tšehetso
For warranty information, please refer to the warranty card included with your product or visit the official Intelbras website. Technical support is available through Intelbras authorized service centers and online resources.
Intelbras Official Websebaka: www.intelbras.com.br
Ka kopo, lokisa mofuta oa sehlahisoa sa hau le nomoro ea serial ha u ikopanya le tšehetso.