
1. Selelekela
Thank you for choosing the Parrot Uncle F8259 13-inch flush mount caged ceiling fan. This manual provides detailed instructions for the safe installation, operation, and maintenance of your new ceiling fan. Please read this manual thoroughly before installation and retain it for future reference. This fan is designed for indoor use in small spaces such as bedrooms and bathrooms, offering both air circulation and lighting.
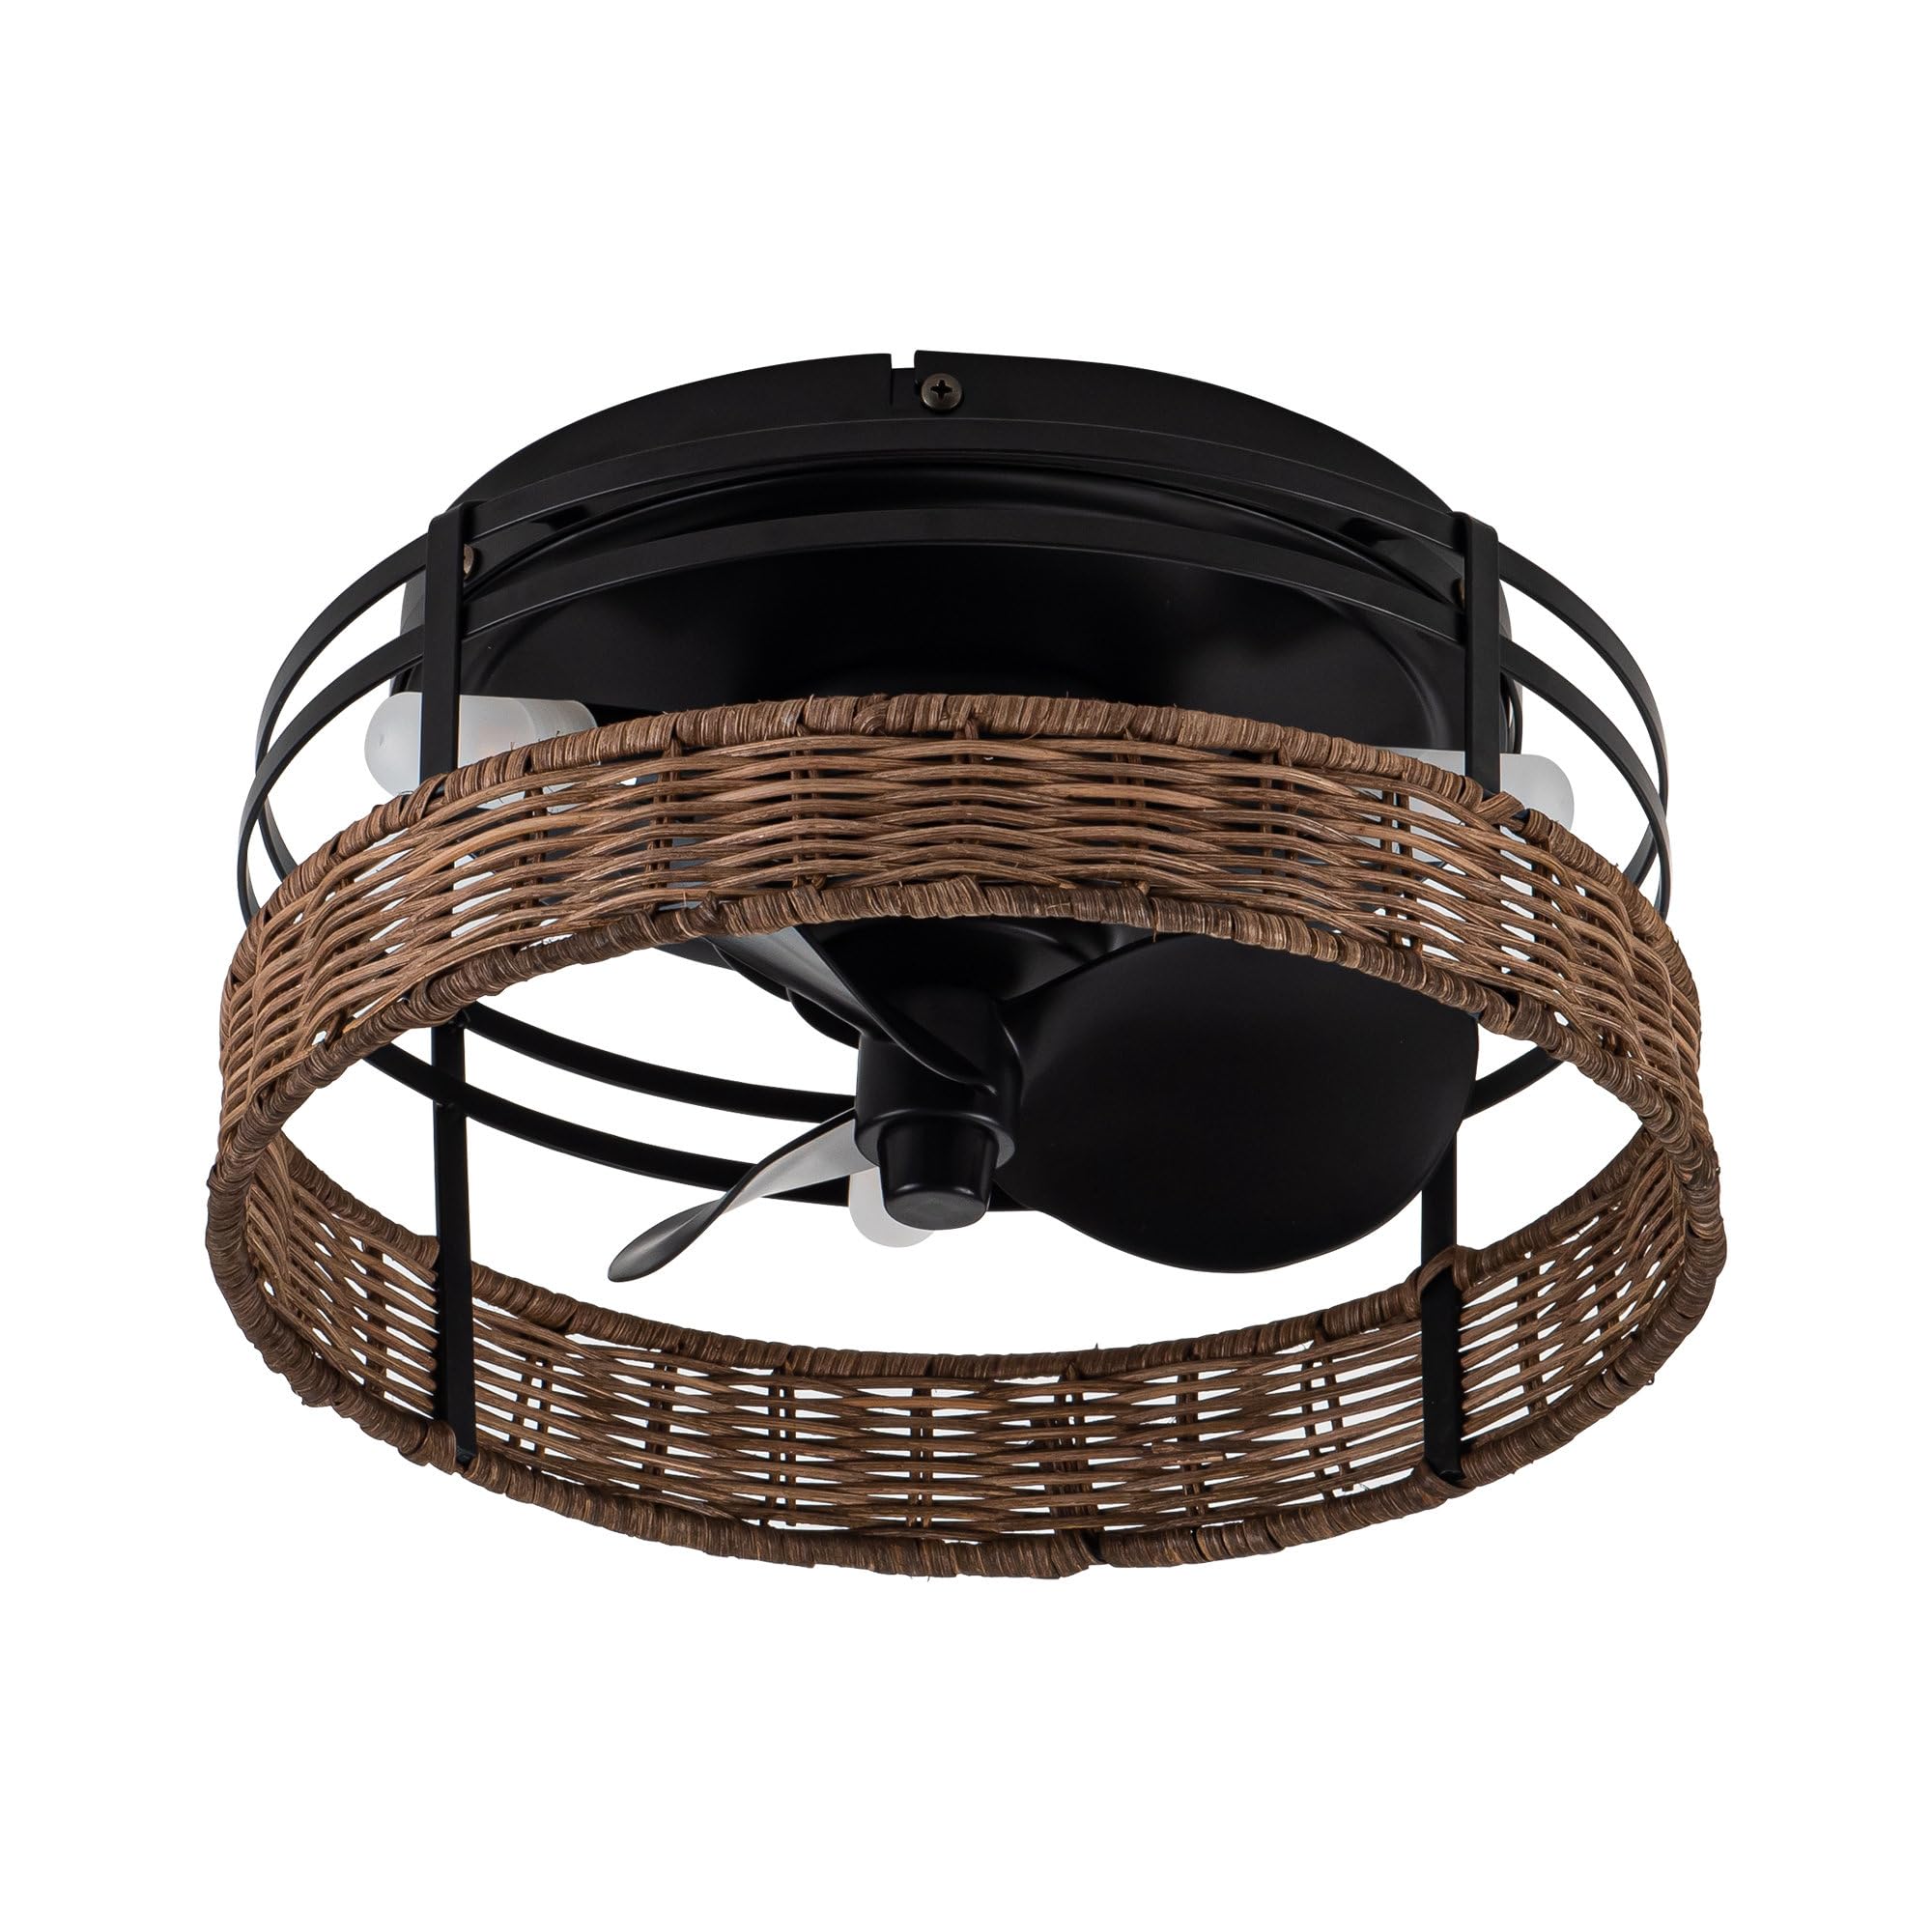
Image 1.1: The Parrot Uncle F8259 ceiling fan with lights, showcasing its rustic design in a home setting.
2. Boitsebiso ba Tšireletseho
- Bala litaelo tsohle: Before beginning installation, read all instructions and safety information.
- Tšireletseho ea Motlakase: All electrical wiring must be performed by a qualified electrician or a person with electrical experience. Ensure the power is turned off at the circuit breaker before installation or servicing.
- Ho hlongoa: The mounting structure must be capable of supporting the weight of the fan (approximately 5.07 lbs).
- Blade Clearance: Ensure there is adequate clearance from the fan blades to any obstructions.
- Mofuta oa Lebone: Use only G9 bulbs as specified. Do not exceed the maximum wattage.
- Tšebeliso ea Ka hare Feela: This fan is designed for indoor use and is not water resistant. Do not install in outdoor or damp libaka.
- Remote Control: Keep the remote control away from children. Batteries are required for the remote (not included).
3. Likahare tsa Sephutheloana
Verify that all components are present before beginning installation. If any parts are missing or damaged, contact customer service.
- Ceiling Fan Unit (Motor, Blades, Caged Housing)
- Ntseng bo eketseha bracket
- Remote Control
- G9 Light Bulbs (3 included)
- Sephutheloana sa Hardware (lisekere, linate tsa terata, jj.)
- Buka ea Tataiso
4. Litlhaloso
| Sebopeho | Tlhaloso |
|---|---|
| Nomoro ea Mohlala | F8259 |
| Boholo ka Kakaretso | 12.5" Diameter x 6.3" Height |
| Canopy Diameter | 9.5" |
| Boima ba 'mele | 5.07 liponto |
| Li-blades | Li-blades tse 3 tsa ABS |
| Motor Max Speed | 1100 RPM |
| Matla a Phallo ea Moea | 800 Cubic Feet Ka Motsotso (CFM) |
| Mohloli oa Leseli | 3 x G9 Bulbs (Max 2 Watts each, 1500 Lumens total) |
| Moqtage | Li-volts tse 120 |
| Mokhoa oa ho Laola | Taolo e hole (RF) |
| Likarolo Tse Khethehileng | Remote Controlled, Reversible Motor |
| Mofuta oa Tlhophiso | Thaba ea Thaba |
| Lintho tse bonahalang | Aine, Acrylonitrile Butadiene Styrene (ABS) |
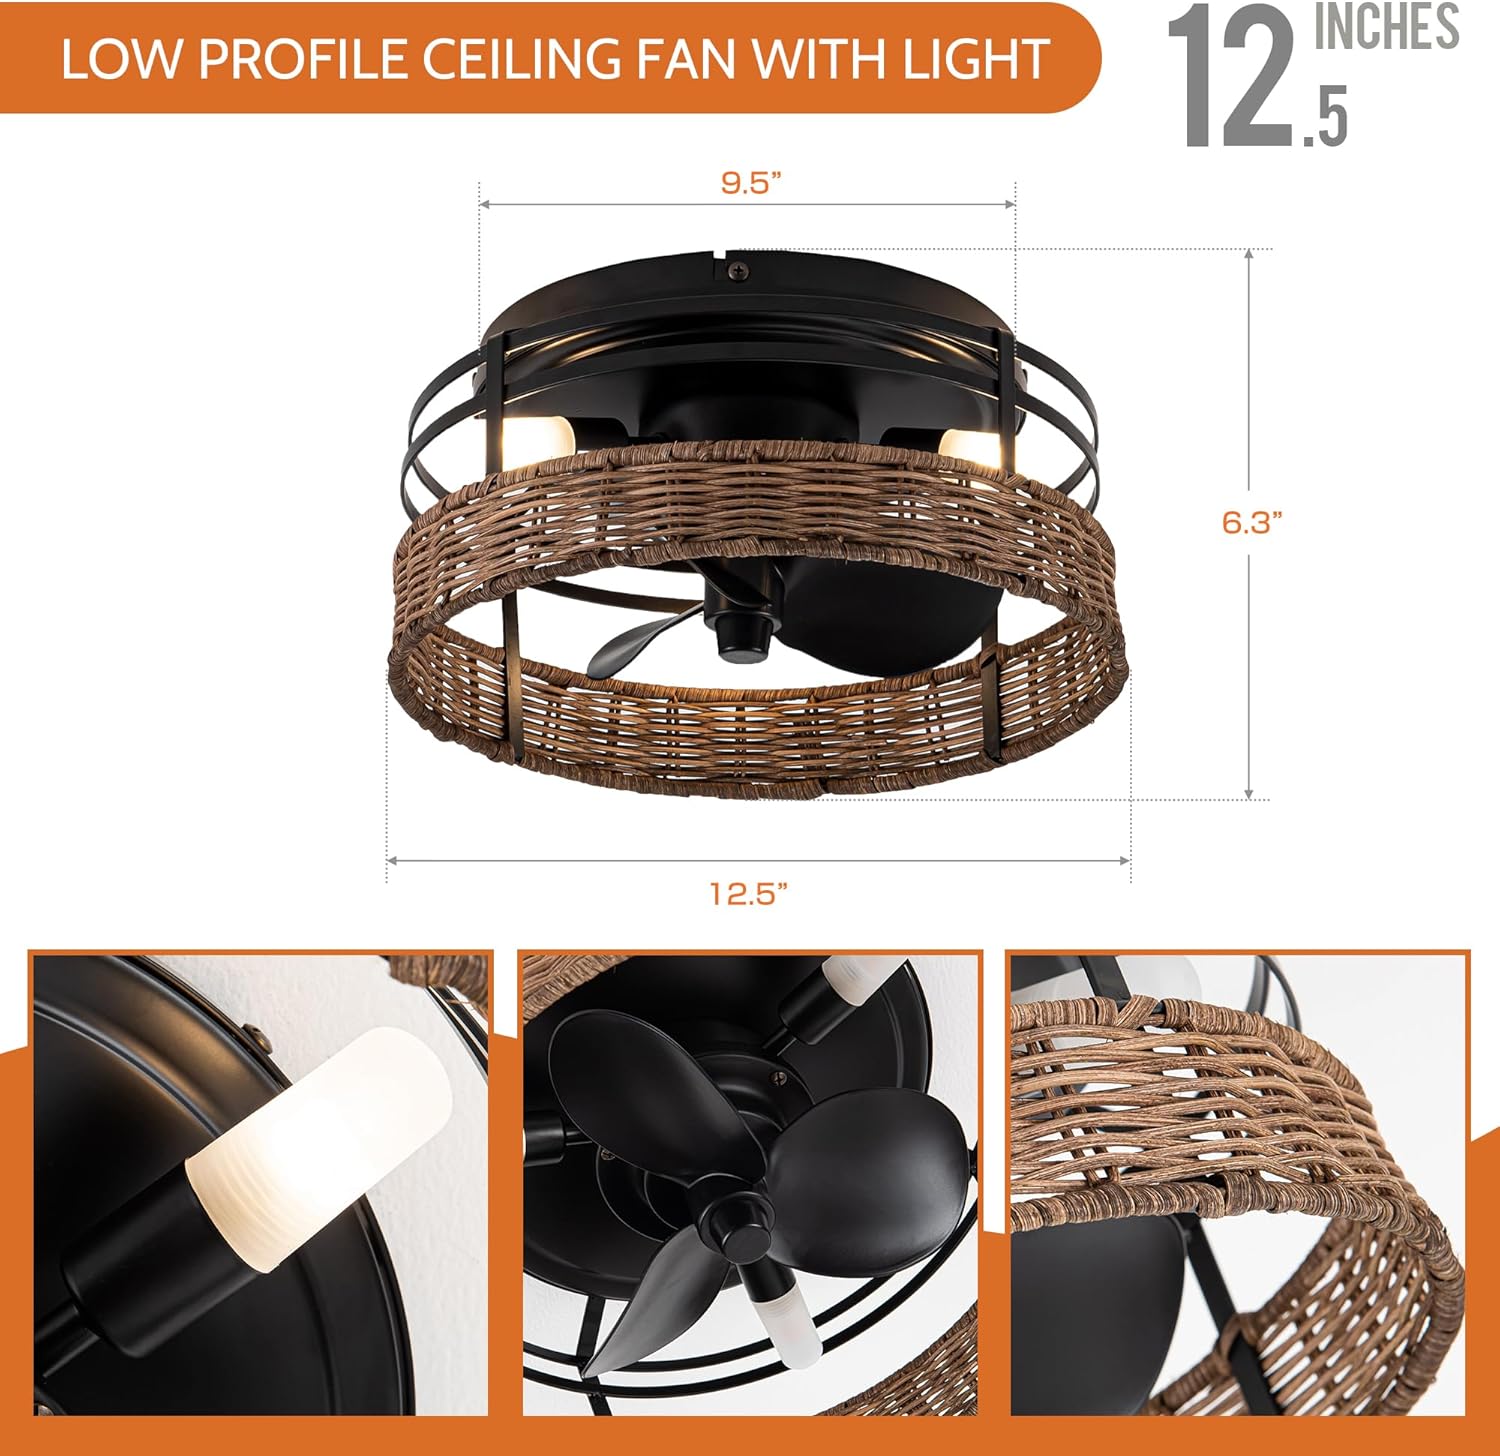
Image 4.1: Product dimensions, including 12.5 inches diameter and 6.3 inches height.
5. Ho kenya
Pele o qala: Ensure power is disconnected at the circuit breaker. Consult a qualified electrician if you are unsure about wiring.
- Lokisetsa Sebaka sa ho Beha: Netefatsa hore lebokose la motlakase le kentsoe ka mokhoa o sireletsehileng mohahong oa moaho mme le ka tšehetsa boima ba fene.
- Hokela Borakete ea Mounting: Secure the mounting bracket to the electrical box using the provided screws.
- Lihokelo tsa Wiring: Connect the fan's electrical wires to the household wiring according to local electrical codes. Typically, this involves connecting live, neutral, and ground wires. Use wire nuts to secure connections.
- Mount the Fan: Carefully lift the fan unit and attach it to the mounting bracket. Ensure all screws are tightened securely.
- Kenya Lebone la Leseli: Insert the three G9 bulbs into their sockets.
- Tlhahlobo ea ho Qetela: Double-check all connections and ensure the fan is securely mounted before restoring power.


6. Litaelo tsa Ts'ebetso
Your Parrot Uncle F8259 ceiling fan is operated using the included remote control. Ensure batteries are installed in the remote (2 x AAA batteries, not included).
6.1 Mesebetsi ea Taolo ea Remoutu

Image 6.1: Remote control layout and functions.
- Lebelo la Fene (1-3): Press buttons '1', '2', or '3' to select low, medium, or high fan speed.
- Fan Stop: Press the 'STOP' button to turn off the fan.
- Tsoela pele / Khutlela morao: Press this button to change the fan's rotation direction (clockwise or counter-clockwise).
- Leseli On / Off: Press the light bulb icon button to turn the light on or off.
- All On/Off: Press the power button to turn both the fan and light on or off simultaneously.
6.2 Mosebetsi oa Enjene e ka Khutlisetsoang Morao
The fan features a reversible motor for year-round comfort. Use the 'Forward / Reverse' button on the remote to switch modes.
- Mokhoa oa Lehlabula (Ho potoloha ho ea ka oache): The fan blades rotate counter-clockwise, pushing air downwards to create a cooling breeze.
- Mokhoa oa Mariha (Ho potoloha ka oache): The fan blades rotate clockwise, drawing air upwards to circulate warm air trapped near the ceiling, helping to distribute heat more evenly.

Image 6.2: Airflow patterns for reversible motor function in summer and winter.
7. Tlhokomelo
Tlhokomelo ea kamehla e netefatsa ts'ebetso e nepahetseng mme e lelefatsa bophelo ba fan ea siling ea hau.
- Ho hloekisa: Hlatsoa fene nako le nako ka sesepa se bonolo, damp cloth. Do not use abrasive cleaners or solvents, as these can damage the finish. Ensure power is off before cleaning.
- Phetoho ea Bulb: To replace G9 bulbs, ensure the power is off and the bulbs have cooled. Carefully remove the old bulb and insert a new G9 bulb of the same type and wattage (Max 2W).
- Tiisa li-Fasteners: Periodically check all screws and fasteners on the fan and mounting hardware to ensure they are secure.
8. Ho rarolla mathata
Haeba o na le mathata ka fene ea hau, sheba mathata le litharollo tse latelang tse tloaelehileng:
| Bothata | Lebaka le ka khonehang | Tharollo |
|---|---|---|
| Fan ha e qale | Ha ho na motlakase ho fene; Likhokahano tsa terata tse hlephileng; Betri ea taolo ea remoutu e shoele. | Check circuit breaker; Verify all wire connections are secure; Replace remote control batteries. |
| Leseli ha le sebetse | Bulb is faulty; Loose wire connection; Remote control battery dead. | Replace G9 bulb; Check light fixture wiring; Replace remote control batteries. |
| Remote control ha e sebetse | Batteries are dead or incorrectly inserted; Remote not paired (if applicable). | Replace batteries (2 x AAA); Ensure batteries are inserted correctly; Refer to remote pairing instructions (if provided separately). |
| Ho sisinyeha ho feteletseng | Loose mounting screws; Fan not securely attached to mounting bracket. | Ensure all mounting screws are tight; Verify fan is properly seated on the mounting bracket. |
9. Tiisetso le Tšehetso
This Parrot Uncle ceiling fan comes with a limited warranty. For specific warranty details, claims, or technical support, please contact Parrot Uncle customer service directly. Keep your purchase receipt as proof of purchase.
Mokhoa oa puisano: Please refer to the contact information provided with your purchase or visit the official Parrot Uncle website bakeng sa tshehetso.