Selelekela
The CAD Audio MXU2 is a versatile 2-channel (2 mic/line) analog mixer featuring a built-in USB interface. Designed for compact and efficient audio processing, it includes +48V phantom power and 16-bit/48 kHz audio resolution, making it suitable for live performance, broadcasting, podcasting, and home recording applications. Its bus-powered design simplifies setup by eliminating the need for an external power supply when connected to a computer.
Sehlahisoa se Felletseview
Likarolo tsa Bohlokoa
- 2 XLR combo inputs for microphone or instrument signals.
- Ideal compact option for live performance, broadcasting, podcasting, or home recording.
- USB output connects to a computer for easy recording or podcasting (16-bit/48kHz).
- Bus powered – no external power supply needed when using with a computer.
- +48V phantom power for use with condenser microphones.
Litaolo le Lihokelo
The CAD Audio MXU2 features a straightforward layout for easy operation. Familiarize yourself with the following components:
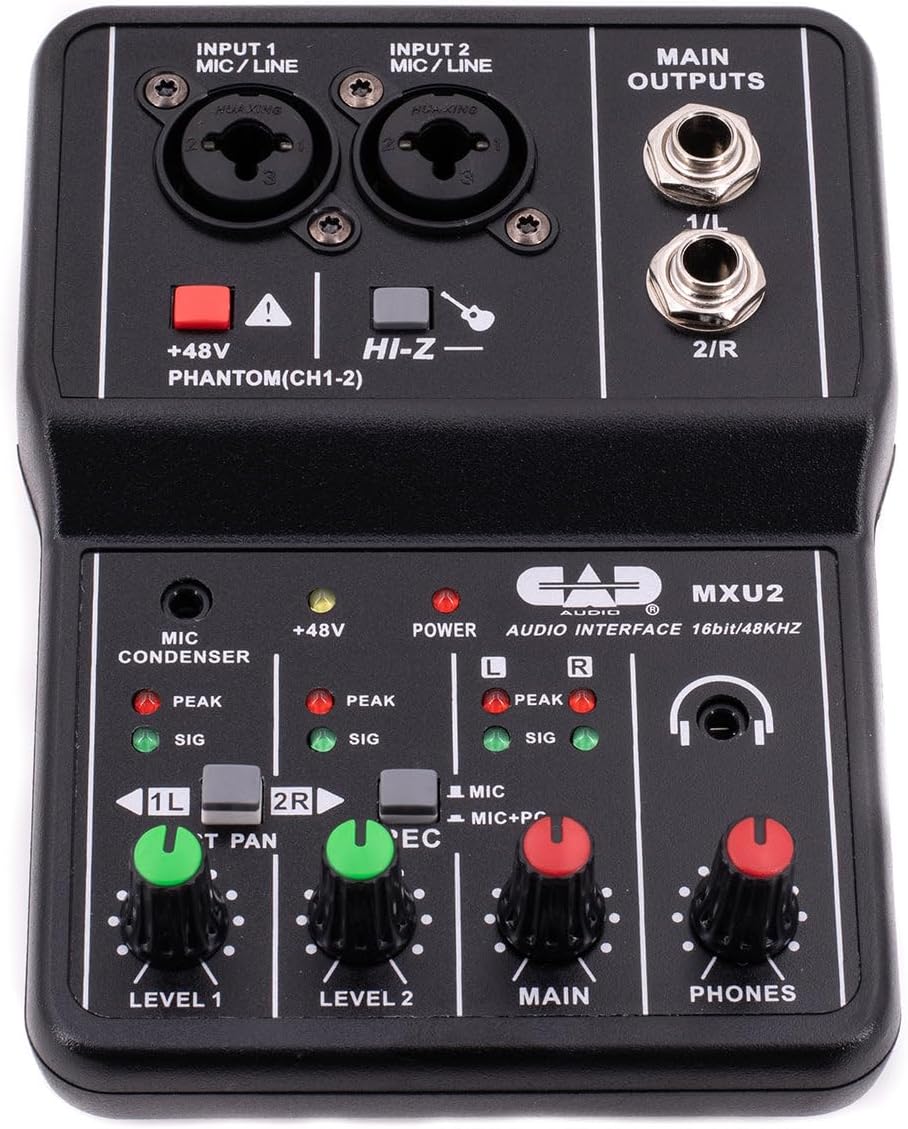
Setšoantšo sa 1: Holimo ho ea tlase view of the CAD Audio MXU2 mixer, showing all controls and inputs/outputs.
- INPUT 1 / INPUT 2 (MIC/LINE): Combo jacks for connecting XLR microphones or 1/4-inch line/instrument cables.
- +48V PHANTOM (CH1-2): Red button to activate +48V phantom power for condenser microphones on both channels. An indicator LED illuminates when active.
- HI-Z: Switch for input 2 to optimize impedance for high-impedance instruments like electric guitars.
- LEVEL 1 / LEVEL 2: Rotary knobs to adjust the input gain for Channel 1 and Channel 2, respectively.
- ST PAN / 2R: Switch for Channel 2. In ST PAN mode, Channel 2 is panned to the right. In 2R mode, Channel 2 is routed to the right output.
- REC (MIC / MIC+PC): Switch to select the recording source for the USB output. MIC records only the mixer inputs. MIC+PC records mixer inputs mixed with audio from the computer.
- TLHOKOMELISO: Rotary knob to control the overall output level to the MAIN OUTPUTS.
- MEFONO: Rotary knob to control the volume of the headphone output.
- MAIN OUTPUTS (1/L, 2/R): 1/4-inch TRS jacks for connecting to studio monitors or other amptsamaiso ea ho hloekisa.
- USB Port (Rear): Connects the mixer to a computer for audio interface functionality and bus power.
- POWER Switch (Rear): Selects between PC (USB bus power) and DC (external power, adapter not included).

Setšoantšo sa 2: The MXU2 mixer with its USB cable connected, illustrating the compact design and connectivity.
Tlhophiso
1. Ho hokela ho Khomphuta
- Ensure the MXU2's rear POWER switch is set to PC.
- Connect the provided USB cable from the MXU2's USB port to an available USB port on your computer.
- The mixer is typically plug-and-play, requiring no special drivers for most operating systems (Windows, macOS). Your computer should automatically recognize it as an audio device.
- Select the MXU2 as your input/output audio device in your computer's sound settings and your Digital Audio Workstation (DAW) or recording software.
2. Connecting Microphones and Instruments
- Maekerofounu: Connect XLR microphones to the INPUT 1 or INPUT 2 combo jacks using XLR cables. For condenser microphones, press the +48V PHANTOM button. The red LED will illuminate. Caution: Do not activate phantom power for dynamic microphones or ribbon microphones unless specified by the manufacturer, as it may cause damage.
- Instruments/Line-Level Devices: Connect instruments (e.g., guitar, bass) or line-level devices (e.g., keyboard, drum machine) to the INPUT 1 or INPUT 2 combo jacks using 1/4-inch TRS or TS cables. For high-impedance instruments like electric guitars, engage the HI-Z switch for Input 2.
3. Connecting Output Devices
- Studio Monitors/Speakers: Connect your studio monitors or powered speakers to the MAIN OUTPUTS (1/L, 2/R) using 1/4-inch TRS cables.
- Li-headphone: Plug your headphones into the 1/4-inch PHONES jack.
Ho sebetsa
1. Input Level Adjustment
- Before playing or speaking, turn the MOHATO 1 le MOHATO 2 knobs fully counter-clockwise.
- Begin playing your instrument or speaking into the microphone. Slowly turn the corresponding LEVEL knob clockwise until the SIG (signal) LED illuminates consistently.
- Adjust the level so that the PEAK LED only flashes occasionally during the loudest parts of your performance. If the PEAK LED stays lit, the signal is clipping, and you should reduce the input level.
2. Main Output and Monitoring
- Fetola MOHLOMI knob to control the overall volume sent to your studio monitors or speakers.
- Sebelisa le LIFONO knob to set a comfortable listening volume for your headphones.
3. Recording Modes (REC Switch)
- MIC: In this mode, only the audio from the mixer's inputs (microphones/instruments) is sent to your computer via USB. This is ideal for recording new tracks.
- MIC+PC: This mode mixes the audio from the mixer's inputs with the audio playback from your computer. This is useful for monitoring your performance along with backing tracks or previously recorded material.
4. Stereo Panning (ST PAN / 2R Switch)
- The ST PAN / 2R switch affects how Input 2 is routed. In ST PAN mode, Input 2 is panned to the right channel of the stereo output. In 2R mode, Input 2 is routed directly to the right output, bypassing the pan control.
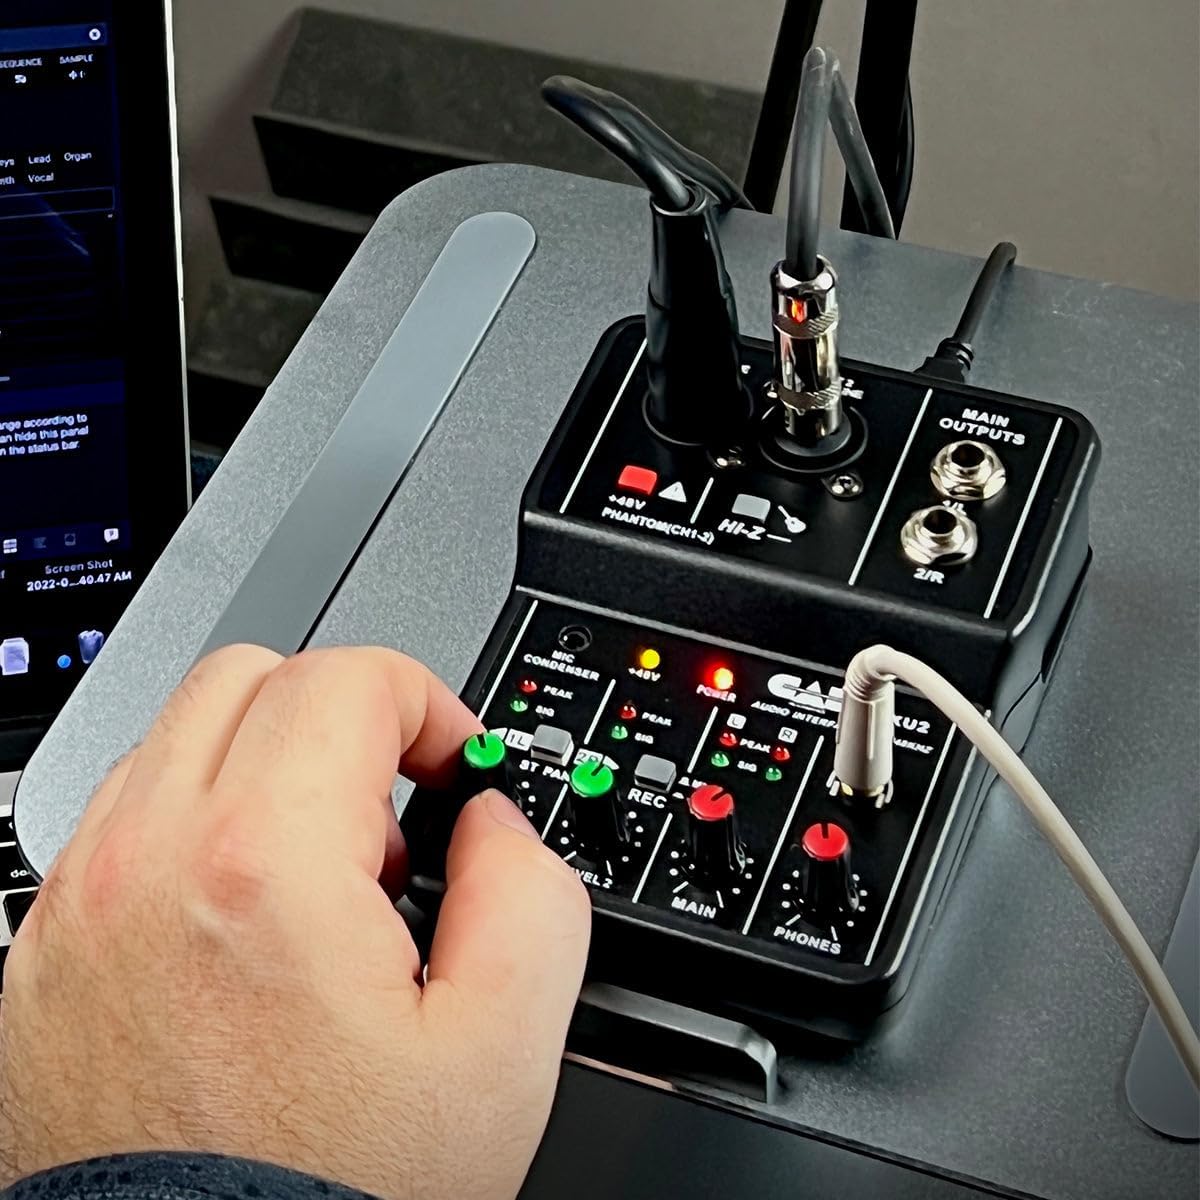
Setšoantšo sa 3: A user's hand adjusting a level knob on the MXU2 mixer, demonstrating typical operation.
Tlhokomelo
Ho hloekisa
- Disconnect the mixer from all power sources and devices before cleaning.
- Use a soft, dry cloth to wipe down the exterior of the unit.
- Bakeng sa litšila tse manganga, d hanyenyaneamp cloth can be used, followed by a dry cloth. Avoid using harsh chemicals, solvents, or abrasive cleaners.
- Se ke oa lumella maro ho kena yuniti.
Polokelo
- Boloka motswako sebakeng se pholileng, se omileng hole le letsatsi le tobileng le mocheso o feteletseng.
- Protect the unit from dust and moisture when not in use.
Tlhokomelo e Akaretsang
- Avoid dropping or subjecting the mixer to strong impacts.
- Do not attempt to disassemble or modify the unit, as this will void the warranty.
- Etsa bonnete ba hore ho na le moea o nepahetseng ho potoloha yuniti nakong ea ts'ebetso.
Ho batle phoso
No Power / Device Not Recognized
- Sheba Khokahano ea USB: Ensure the USB cable is securely connected to both the mixer and the computer. Try a different USB port on your computer.
- Power Switch Setting: Verify the rear POWER switch is set to PC for bus power. If using an external DC adapter (not included), ensure the switch is set to DC and the adapter is functioning.
- Cable Integrity: Try a different USB cable to rule out a faulty cable.
- Tsebiso ea Khomphutha: Check your computer's Device Manager (Windows) or System Information (macOS) to see if the MXU2 is listed as an audio device. Restart your computer if necessary.
Ha ho Sephetho sa Modumo
- Level Knobs: Netefatsa MOHATO 1, MOHATO 2, MOHLOMI, le LIFONO knobs are turned up sufficiently.
- Likhokahano tsa Khumo: Verify that your studio monitors/speakers are properly connected to the LIPHETOHO SEHOLO and are powered on. Check headphone connection.
- Computer Audio Settings: Confirm that the MXU2 is selected as the output device in your computer's sound settings and your recording software.
- REC Switch: If you expect to hear computer audio, ensure the REC switch e hlophiselitsoe ho MIC+PC.
Molumo o sothehileng / Clipping
- Maemo a Kenyeletso: Fokotsa MOHATO 1 or MOHATO 2 knobs if the PEAK LED is constantly lit.
- Maemo a Sephetho: Netefatsa hore MOHLOMI le LIFONO levels are not set too high, causing distortion in connected speakers or headphones.
- Boleng ba Cable: Use high-quality, shielded cables to minimize interference.
Mathata a Phantom Power
- Kenyelletso: Netefatsa hore +48V PHANTOM button is pressed and its LED is illuminated when using condenser microphones.
- Tšebelisano ea Maekerofounu: Confirm your microphone requires phantom power.
Litlhaloso
| Sebopeho | Tlhaloso |
|---|---|
| Brand | CAD Audio |
| Mohlala | MXU2 |
| Palo ea Likanale | 2 |
| Theknoloji ea Khokahano | USB |
| Kenyeletso ya Modumo | XLR Combo (Mic/Line) |
| Mofuta oa Sehokahanyi sa Output | TRS (1/4-inch) |
| Matla a Phantom | + 48V (e fetohang) |
| SampLing Rate | 48 kHz |
| Botebo bo Botle | 16-bit |
| Mohloli oa Matla | USB Bus-Powered (PC mode) / Corded Electric (DC mode, adapter not included) |
| Boima ba Ntho | 0.31 lik'hilograma |
| UPC | 631922109399 |
Warranty le Tšehetso
Boitsebiso ba Warranty
The CAD Audio MXU2 2-Channel USB Mixer is covered by a Tiisetso ea lilemo tse 2 ea moetsi. This warranty typically covers defects in materials and workmanship under normal use. Please retain your proof of purchase for warranty claims.
Tšehetso ea Bareki
For technical assistance, troubleshooting beyond this manual, or warranty service, please contact CAD Audio customer support directly. You can usually find contact information, FAQs, and additional resources on the official CAD Audio website. When contacting support, please have your product model (MXU2) and proof of purchase available.