
1. Selelekela
This manual provides essential information for the proper setup, operation, and maintenance of your Sony SLV-FT5 VHS Video Cassette Recorder (VCR). Please read these instructions thoroughly before using the unit to ensure optimal performance and safety.
2. Boitsebiso ba Tšireletseho
Kamehla latela litemoso tsa ts'ireletso ha u sebelisa sehlahisoa sena ho fokotsa kotsi ea mollo, ts'oaetso ea motlakase le kotsi.
- Se ke oa pepesetsa yuniti ho pula kapa mongobo.
- U se ke ua bula khabinete. Fetisetsa litšebeletso ho basebetsi ba tšoanelehang feela.
- Etsa bonnete ba hore ho na le moea o nepahetseng; u se ke ua thiba masoba a moea.
- Sebelisa feela phepelo ea motlakase e boletsoeng bakeng sa yuniti ena.
- Boloka sesebelisoa hole le mehloli ea mocheso le khanya ea letsatsi.
3. Seta
3.1 Ho phutha
Carefully remove the VCR and all accessories from the packaging. Verify that all components are present: the SLV-FT5 VCR unit, remote control, and necessary connection cables (e.g., RCA audio/video cables).
3.2 Ho hokahana le Thelebishene
To connect the VCR to your television, use the provided RCA audio/video cables. Match the colored plugs to the corresponding colored jacks on both the VCR and your TV (Yellow for Video, White for Left Audio, Red for Right Audio).

Setšoantšo sa 1: Rear panel of the Sony SLV-FT5 VCR. This image displays the various input and output ports, including RCA jacks for audio and video, and the power input. The product label with model number SLV-FT5 and power specifications (100V 18W 50/60Hz) is also visible.
3.3 Khokelo ea Matla
Plug the VCR's power cord into a standard electrical outlet (AC 100V, 50/60Hz). Ensure the power outlet is easily accessible.
3.4 Remote Control Setup
Open the battery compartment on the back of the remote control and insert two AA batteries, observing the correct polarity (+/-). Close the compartment securely.

Setšoantšo sa 2: The Sony RMT-V219 remote control, designed for the SLV-FT5 VCR. This image also shows the included RCA audio/video cables, which are typically used for connecting the VCR to a television.
4. Ho sebetsa VCR
4.1 Ho Matlafatsa/Ho tima
Tobetsa ea MATLA button on the VCR's front panel or the remote control to turn the unit on or off.
4.2 Loading and Unloading a VHS Tape
- E ea kenya: Insert a VHS cassette into the tape slot on the front of the VCR with the tape window facing forward. The VCR will automatically pull the tape in.
- E laolla: Tobetsa ea EJECT button on the VCR or remote control. The tape will be ejected.
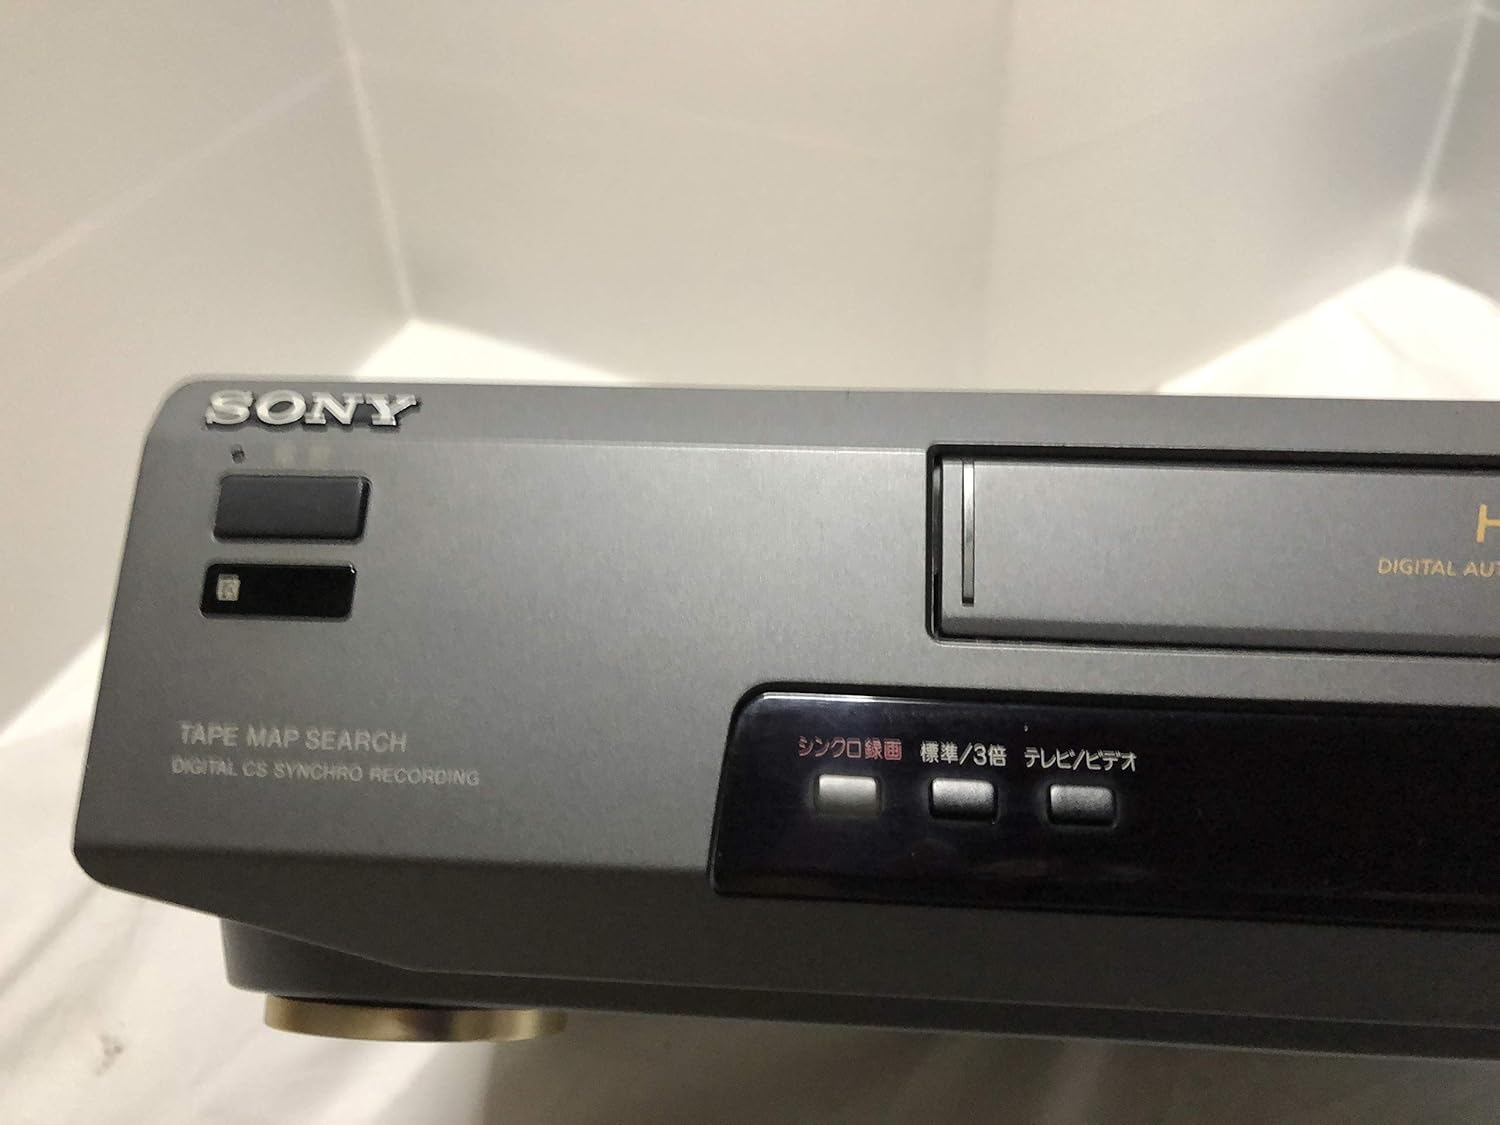
Setšoantšo sa 3: Front left section of the Sony SLV-FT5 VCR. This view highlights the tape loading slot and the 'TAPE MAP SEARCH' feature, which assists in navigating recorded content on a tape.
4.3 Ho bapala
After loading a tape, press the BAPALA button (►) on the VCR or remote control to begin playback. Use the PHETHA (∥), EMA (■), PUSELETSO (◀◀), and PHAKANG PELE (►►) buttons to control playback.

Setšoantšo sa 4: Front right section of the Sony SLV-FT5 VCR. This image displays the main playback controls (Play, Stop, Rewind, Fast Forward, Pause) and additional buttons for 'Quick Timer' and 'Tracking' adjustments.
4.4 Ho rekota
To record, ensure a blank or recordable tape is inserted. Select the desired input source (e.g., TV channel). Press the REC (●) button on the VCR or remote control. Press EMA (■) to end recording.
4.5 Tracking Adjustment
If the picture quality during playback is poor (e.g., horizontal lines or noise), use the TS'ELISO buttons on the front panel or remote control to fine-tune the tape's alignment with the VCR's heads.
5. Tlhokomelo
5.1 Ho hloekisa Yuniti
Wipe the exterior of the VCR with a soft, dry cloth. For stubborn stains, use a cloth lightly dampe tšeloa ka sesepa se bonolo, ebe o hlakola o omme. Se ke oa sebelisa li-abrasive cleaners kapa solvents.
5.2 Ho Hloekisa Hlooho
Over time, VCR heads can accumulate dirt, leading to poor picture and sound quality. Use a commercially available dry-type VHS head cleaning cassette according to its instructions. Avoid wet-type cleaners as they can damage the heads.
5.3 Polokelo
When not in use for extended periods, disconnect the VCR from the power outlet. Store the unit in a cool, dry place, away from dust and direct sunlight.
6. Ho rarolla mathata
If you encounter issues with your VCR, refer to the following common problems and solutions before seeking professional service.
| Bothata | Lebaka le ka khonehang | Tharollo |
|---|---|---|
| Ha ho matla | Power cord disconnected; power outlet issue | Sheba khokahanyo ea thapo ea matla; leka mokhoa o mong. |
| Ha ho setšoantšo/molumo | Incorrect TV input; loose A/V cables | Select correct TV input (e.g., Video 1, AV); ensure A/V cables are securely connected. |
| Poor picture quality (snowy, lines) | Dirty VCR heads; tracking issue; old/damaged tape | Clean VCR heads; adjust tracking; try a different tape. |
| Theipi e ke ke ea ntšoa | Power issue; mechanical malfunction | Ensure power is on; try pressing EJECT multiple times. If issue persists, seek service. |
| Remote control ha e sebetse | Dead batteries; obstructed sensor | Replace batteries; ensure no obstacles between remote and VCR sensor. |
7. Litlhaloso
| Sebopeho | Tlhaloso |
|---|---|
| Brand | Sony |
| Nomoro ea Mohlala | SLV-FT5 |
| Mofuta oa Media | VHS |
| Qeto | 720 x 480 pixels |
| Boima ba Sehlahisoa | 4160 dikgerama |
| Mokhoa oa Phatlalatso ea Audio | Setereo |
| Liforomo tsa Audio tse tšehelitsoeng | Monaural, Stereo |
| Khouto ea Video | Analoge |
| Lisebelisoa tse lumellanang | Thelebishene |
| Input Video Compatibility | NTSC |
| Litlhoko tsa Matla | 100V, 18W, 50/60Hz |
8. Tiisetso le Tšehetso
For warranty information and customer support, please refer to the documentation included with your purchase or visit the official Sony websebaka. Boloka bopaki ba hau ba theko bakeng sa likopo tsa waranti.