
1. Selelekela le Sehlahisoa Overview
The DECA Class Booster 400E is a versatile battery charger and booster designed for charging 12V and 24V lead-acid batteries and providing assistance for engine starting. This unit incorporates essential safety features such as thermostatic protection, short-circuit protection, and protection against polarity inversion to ensure safe and reliable operation.
This manual provides detailed instructions for the safe and effective use, maintenance, and troubleshooting of your DECA Class Booster 400E.
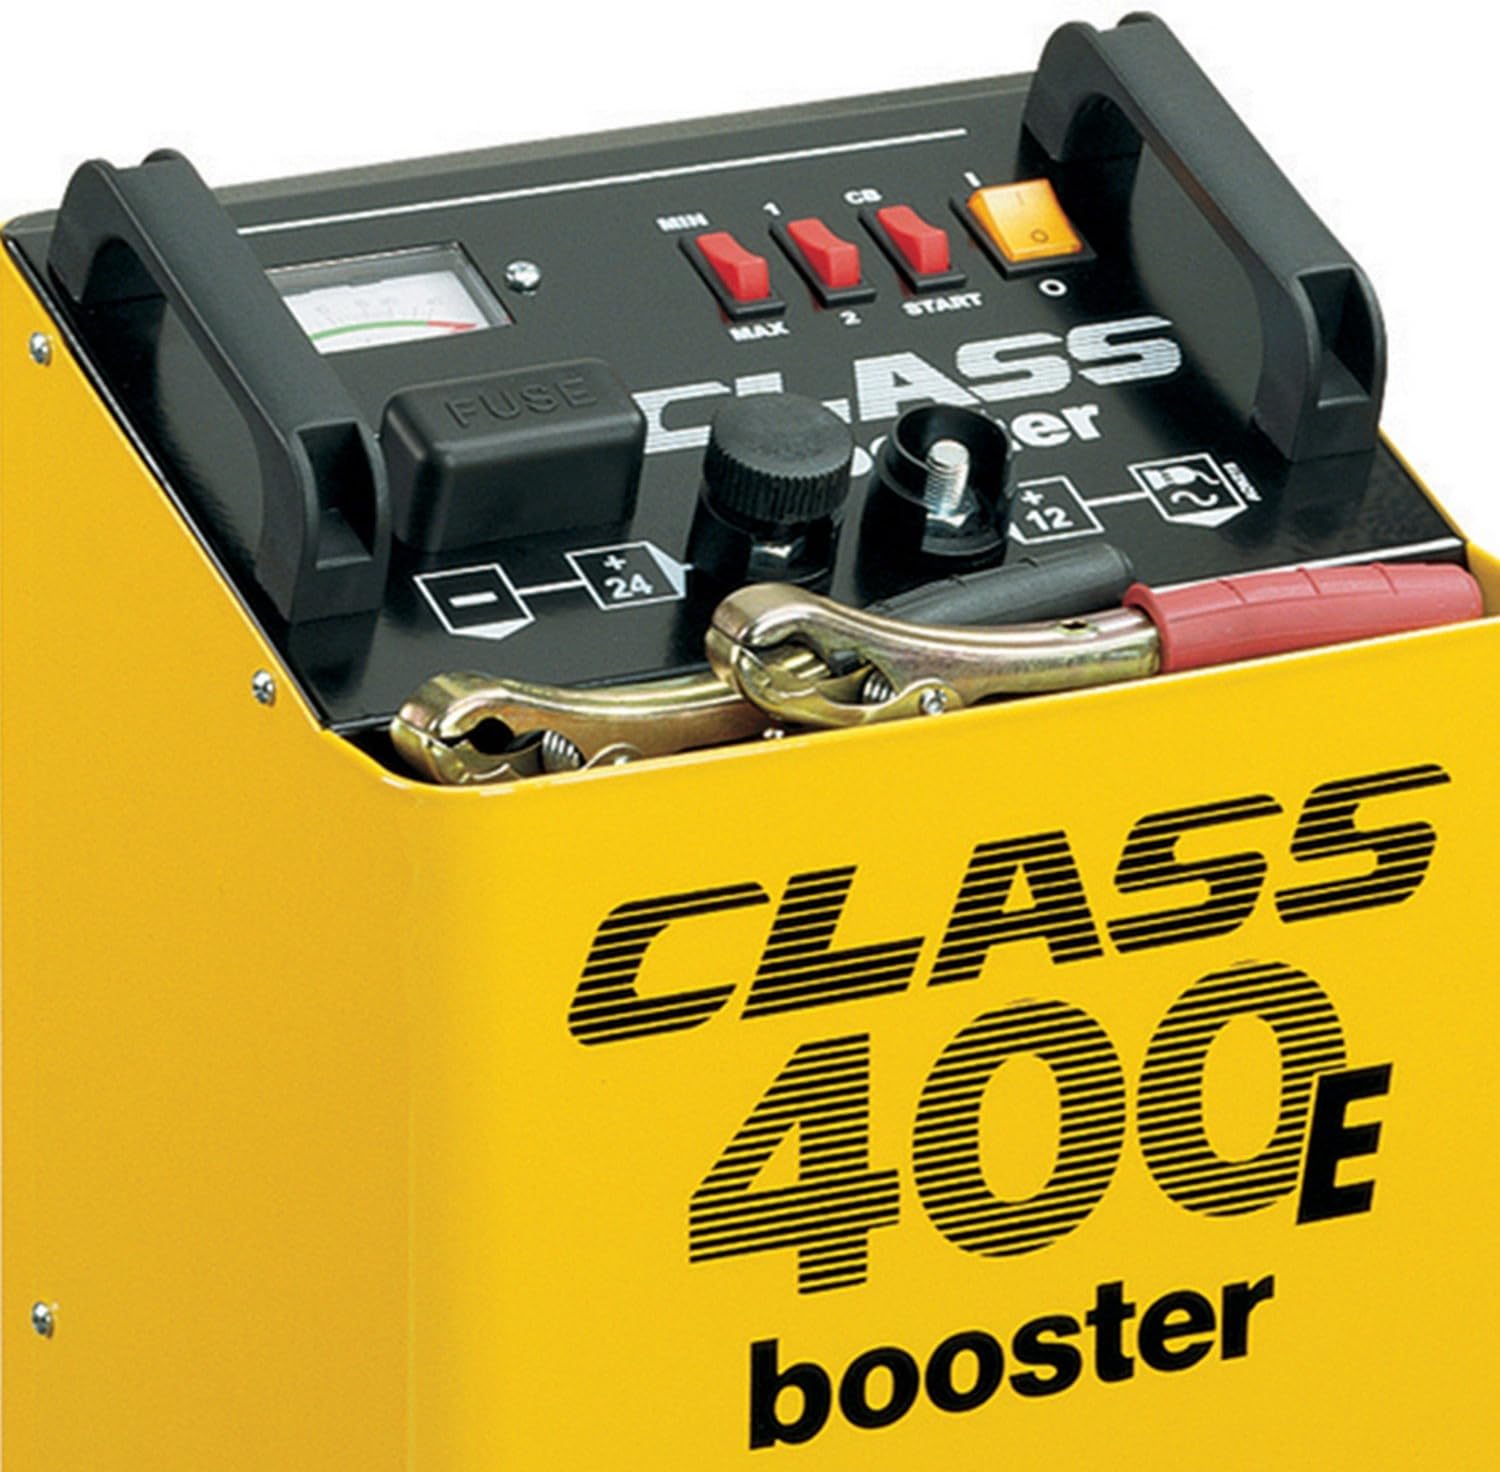
Setšoantšo sa 1: Pele view of the DECA Class Booster 400E, showing the control panel, fuse, and battery clamps.
2. Litaelo tsa Tšireletso
Read all safety warnings and instructions carefully before using this product. Failure to follow the warnings and instructions may result in electric shock, fire, and/or serious injury.
- Moea oa moea: Batteries generate explosive gases during charging. Ensure the work area is well-ventilated. Do not charge in a confined space.
- Tšireletso ea Mahlo le Sefahleho: Always wear appropriate eye and face protection (safety glasses, face shield) when working near batteries. Battery acid is corrosive.
- Tšireletseho ea Motlakase: Do not expose the charger to rain or wet conditions. Never operate the charger with damaged cables or clamps. Ensure the power cord is properly grounded.
- Lisebelisoa tse tukang: Keep sparks, flames, and smoking materials away from the battery and charger.
- Hakolla Matla: Always disconnect the charger from the mains power supply before making or breaking connections to the battery.
- Children and Unauthorized Persons: Sesebelisoa sena ha sea rereloa ho sebelisoa ke batho (ho kenyeletsoa bana) ba nang le matla a fokotsehileng a 'mele, kutlo kapa kelello, kapa ba hlokang boiphihlelo le tsebo, ntle le haeba ba filoe tlhokomelo kapa taelo mabapi le tšebeliso ea sesebelisoa ke motho ea ikarabellang bakeng sa polokeho ea bona.
- Tšireletso ea Mocheso: The unit is equipped with thermostatic protection. If the unit overheats, it will automatically shut down. Allow it to cool before resuming operation.
3. Seta
- Ho phutha: Carefully remove the DECA Class Booster 400E from its packaging. Inspect the unit for any signs of damage.
- Sebaka: Place the charger on a stable, level surface in a well-ventilated area. Ensure there is sufficient space around the unit for air circulation.
- Tokiso ea Betri: Ensure the battery terminals are clean and free of corrosion. If the battery has removable caps, check the electrolyte level and top up with distilled water if necessary, ensuring caps are securely replaced before charging.
- Connecting to Battery:
- Connect the KHIBEDU (+) clamp ho ea e ntle (+) terminal ea betri.
- Connect the BOTSO (-) clamp ho ea fosahetse (-) terminal of the battery. If the battery is in a vehicle, connect the black clamp to the vehicle chassis away from the battery and fuel line.
- Ensure connections are firm and secure.
- Connecting to Mains Power: Plug the charger's power cord into a suitable grounded electrical outlet.

Setšoantšo sa 2: DECA Class Booster 400E showing approximate dimensions for placement.
4. Litaelo tsa Ts'ebetso
4.1. Ho tjhaja betri
- Khetha Battery Voltage: Sebelisa molumotage selector switch (typically labeled 12V/24V) to match the voltage ea betri e ntseng e tjhajoa.
- Khetha Mokhoa oa ho tjhaja: The unit may have MIN/MAX or 1/2 settings for charging current. Select MIN for slower, gentler charging or MAX for faster charging. Refer to the battery manufacturer's recommendations for optimal charging rates.
- Qala ho tjhaja: Turn on the power switch (often labeled 'ON/OFF' or 'START'). The ammeter on the front panel will indicate the charging current. The current will gradually decrease as the battery charges.
- Hlahloba ho tjhaja: Periodically check the ammeter. When the current drops to a very low level (near zero), the battery is fully charged.
- Qetella ho tjhaja: Turn off the power switch. Disconnect the charger from the mains power supply. Then, disconnect the BLACK (-) clamp, followed by the RED (+) clamp ho tsoa ho betri.
4.2. Engine Boosting (Starting Assistance)
The boosting function provides a high current for a short period to assist in starting an engine with a discharged battery. Do not use the booster function for prolonged periods.
- Hokela ho Betri: Follow the connection steps as described in Section 3.4.
- Khetha Battery Voltage: Etsa bonnete ba hore molumotage selector switch matches the vehicle's battery voltage (12V kapa 24V).
- Select Booster Mode: Set the switch to the 'START' or 'BOOST' position.
- Attempt Start: Turn the ignition key to start the engine. Do not crank the engine for more than 5-10 seconds. If the engine does not start, wait for at least 60 seconds before attempting again to allow the charger to cool.
- Hakolla: Once the engine starts, immediately turn off the charger's power switch. Disconnect the BLACK (-) clamp, then the RED (+) clamp.
5. Tlhokomelo
- Ho hloekisa: Keep the charger clean and dry. Wipe the exterior with a soft, damp lesela. Se ke oa sebelisa li-solvents kapa li-abrasive cleaners.
- Cable le Clamp Tlhahlobo: Kamehla hlahloba lithapo tsa ho tjhaja le clamps for any signs of damage, fraying, or corrosion. Replace damaged components immediately.
- Fuse Replacement: The unit is equipped with a fuse for protection. If the charger stops working, check the fuse (visible on the front panel, labeled 'FUSE'). Replace it only with a fuse of the same type and rating as specified by the manufacturer. Always disconnect from mains power before replacing the fuse.
- Polokelo: Store the charger in a cool, dry place, away from direct sunlight and moisture, when not in use. Ensure cables are neatly coiled.
6. Ho rarolla mathata
- Charger ha e bulehe:
- Check if the power cord is securely plugged into a live outlet.
- Verify the mains power supply is active.
- Inspect the fuse. Replace if blown (refer to Section 5).
- Battery Not Charging / Low Ammeter Reading:
- Netefatsa hore betri e ea lekanaamps li hoketsoe ka mokhoa o sireletsehileng litsing tsa betri.
- Confirm the correct battery voltage (12V or 24V) is selected on the charger.
- Check if the battery is severely discharged or faulty. Some deeply discharged batteries may not accept a charge immediately.
- The battery may be fully charged if the current is very low.
- Booster Function Not Working:
- Ensure all connections are secure and the correct voltage khethiloe.
- The vehicle's battery might be completely dead, or there might be a larger issue with the vehicle's starting system.
- Allow the unit to cool if it has recently activated thermal protection.
- Charger Shuts Down During Operation:
- This indicates the thermal protection has activated due to overheating. Allow the unit to cool down in a well-ventilated area before resuming use. Reduce the load or charging rate if possible.
- Check for proper ventilation around the unit.
7. Litlhaloso
- Mohlala: CB400E
- Nomoro ea Karolo: 0400207
- Keletso Voltage: Standard AC Mains (e.g., 230V AC)
- Khumo Voltage: 12V / 24V DC
- Average Charging Current: 26 A
- E Lekanyelitsoe ho Tefisoa Hona Joale: 30 A
- Booster Power: Up to 7.5 kW (for starting assistance)
- Tshireletso: Thermostatic, Short Circuit, Polarity Inversion
- Boima ba 'mele: 19.6 lik'hilograma
- Litekanyo (H x W x D): Hoo e ka bang 64.01 cm x 30 cm x 40.01 cm
- Setifikeiti: CE
- Naha ea tlhaho: San Marino
8. Tiisetso le Tšehetso
For warranty information, technical support, or service inquiries, please refer to the documentation provided with your purchase or contact your retailer or the DECA customer service directly. Please have your model number (CB400E) and part number (0400207) available when contacting support.